
Bathroom Remodel Waterproofing Techniques That Last
Discover essential bathroom remodel waterproofing techniques that protect your home from mold and structural damage, ensuring your new space lasts for years.
By Adnan Nazir
Learn more about Bathroom Remodel for guides, costs, and what to expect.
Compare Bathroom Remodel Pros Near You

Enter your ZIP code to compare top-rated local professionals and request free quotes.
A bathroom remodel is a significant investment, and the difference between a stunning, durable space and a costly, problematic one often comes down to what you cannot see. Water is relentless, and without proper protection, it will find its way into walls, floors, and subfloors, leading to mold, rot, and structural damage. The good news is that modern waterproofing systems are highly effective when installed correctly. This guide walks you through the essential bathroom remodel waterproofing techniques that protect your home and ensure your new bathroom stands the test of time.
Why Waterproofing Matters More Than Tile and Grout
Many homeowners mistakenly believe that tile and grout alone are enough to keep water out. While these materials handle surface moisture, they are not impervious. Grout is porous, and tile installations naturally develop microscopic cracks over time. Water that penetrates these surfaces can saturate the cement board or drywall behind them, creating a perfect environment for mold and mildew. Over time, this trapped moisture can compromise the structural integrity of your home, leading to expensive repairs that dwarf the initial cost of proper waterproofing.
Investing in robust waterproofing during your remodel is not an optional upgrade; it is a fundamental layer of protection. It preserves your home's value, safeguards your family's health, and gives you peace of mind. When you plan your project, allocate a specific portion of your budget for high-quality waterproofing materials and professional labor. In our guide on average bathroom remodel pricing, we break down where these costs typically fall, so you can budget accurately.
Critical Areas to Waterproof in Your Bathroom
Before you purchase a single membrane or bucket of waterproof coating, you need to understand the specific zones within your bathroom that demand protection. These are the areas most exposed to direct water contact and moisture. A comprehensive approach covers all of them, not just the shower floor.
- Shower walls and floor: The entire area inside the shower enclosure, from the floor up to at least six feet high or to the ceiling.
- Bathtub surrounds: The walls around a tub, especially the area where the tub meets the wall and the splash zone above the rim.
- Floor area around the toilet and vanity: The floor that can be exposed to spills, leaks, or splashes from these fixtures.
- The bathroom floor itself: A continuous waterproof membrane under the tile or other flooring material is ideal, particularly for full baths.
Each of these zones has specific challenges. For shower floors, you need a system that handles both water pooling and direct drainage. For tub surrounds, you need a watertight seal at the joint between the tub and the wall board. By identifying these areas early, you can ensure your contractor applies the correct waterproofing technique for each location.
Choosing the Right Waterproofing Membrane
The core of any modern waterproofing system is the membrane. This is a physical barrier that prevents water from seeping through to the structure behind your tile. There are several types available, each with its own installation method and benefits. The choice often depends on your preferred tile type, the substrate being used, and your contractor's expertise.
Sheet Membranes for Reliable Coverage
Sheet membranes are plastic or rubberized sheets that are applied directly to the substrate. They are often considered the most foolproof method because they provide a uniform, consistent layer with a known thickness. These sheets are installed using a special adhesive and seams are sealed with a compatible tape or bonding agent. Brands like Schluter-Kerdi and Wedi are popular for their reliability. Sheet membranes work exceptionally well with large-format tiles and are a favorite among contractors for their durability and ease of inspection.
Liquid Applied Membranes for Seamless Protection
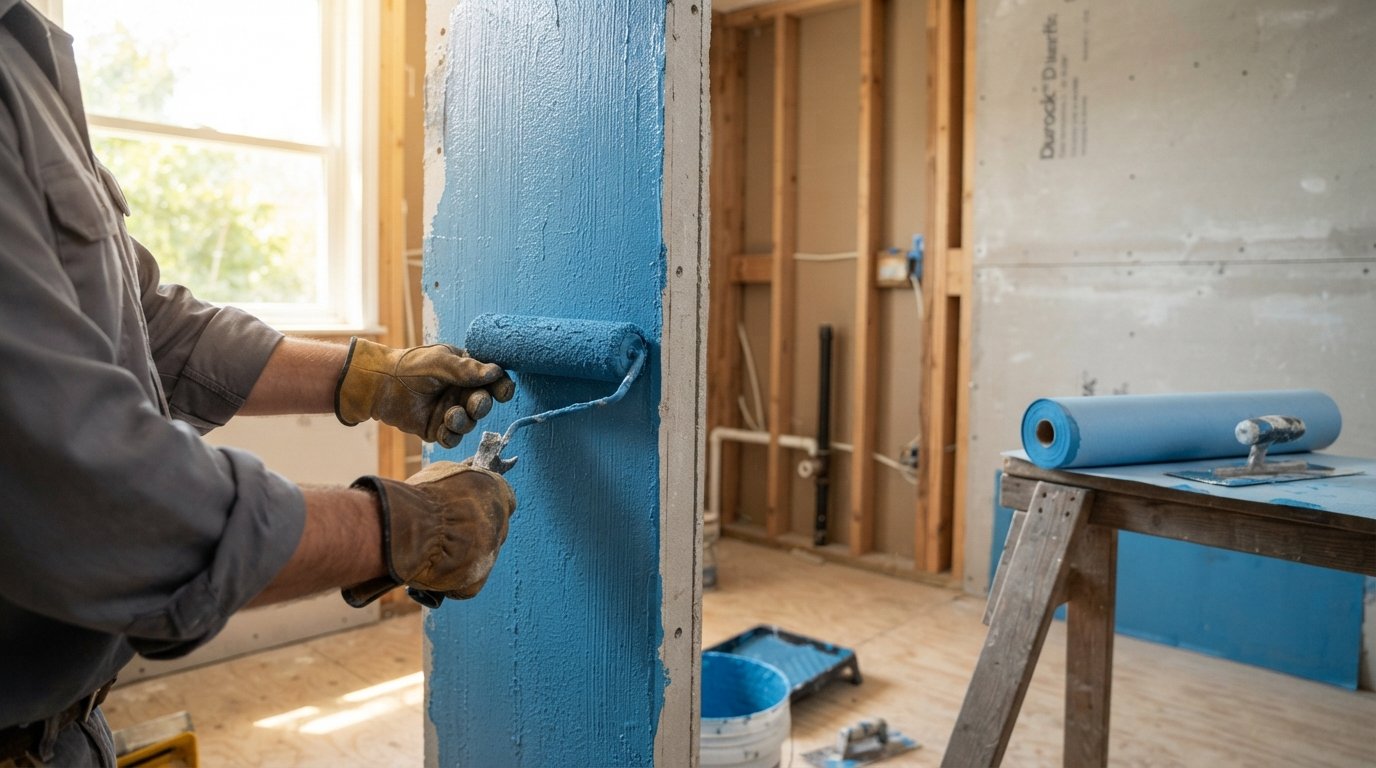
Liquid waterproofing membranes are applied as a thick paint or roller coat, drying to form a seamless, rubber-like layer. They are excellent for covering complex shapes, corners, and penetrations like pipe flanges. Products like RedGard and Hydro Ban are common choices. Liquid membranes are applied in multiple coats, and it is critical to follow the manufacturer's instructions for the number of coats needed to achieve the correct dry film thickness. One advantage is that they conform perfectly to any surface, reducing the risk of pinholes at seams.
Both systems are highly effective. The best choice for your remodel depends on the experience of your installer. A contractor who has worked extensively with one system will likely produce a better result than one who is learning a new method on your project. Discuss the options with your contractor and ask about their familiarity with each type.
The Right Substrate: Cement Board and Beyond
Waterproofing membranes are only as good as the surface they are applied to. Traditional drywall is a poor choice for wet areas. The industry standard is cement board, such as HardieBacker or Durock, which is impervious to water. However, cement board itself does not stop water; it simply will not rot or degrade. The waterproofing membrane must be applied over the cement board to prevent water from passing through the board to the wood framing behind it.
Another popular option is foam-backed tile board, like WediBoard. These rigid foam panels come with an integrated waterproof membrane on their surface. They are cut to size, and the seams are sealed with specific tape and sealant, creating a monolithic waterproof envelope. These systems are lighter and easier to cut than cement board and provide excellent insulation, but they generally cost more per square foot. Your choice of substrate will influence the thickness of your walls and how your fixtures are mounted, so it is best decided early in the design phase.
Step-by-Step Waterproofing Process for a Shower
To give you a clear picture of how these techniques come together, here is a typical sequence for waterproofing a shower using a liquid membrane over cement board. This process is best performed by a professional, but understanding it helps you ask the right questions.
- Prepare the substrate: After the cement board is installed, all seams and corners are taped with an alkali-resistant mesh tape and embedded in thinset mortar. The surface must be clean, dry, and free of dust.
- Apply the first coat: Using a brush or roller, apply the first coat of the liquid membrane to the entire shower area, including corners and around pipe penetrations. Work it into all joints and fasteners.
- Reinforce corners and seams: While the first coat is still tacky, embed a strip of waterproofing fabric or a specific reinforcing mesh into all inside corners and over any changes in plane. This step is crucial for preventing cracks.
- Apply subsequent coats: After the first coat and fabric have dried, apply two or more additional coats of the liquid membrane until the manufacturer's recommended dry film thickness is achieved. Allow each coat to dry completely, which usually takes several hours to a day, depending on humidity.
- Water test (if required): In some cases, especially for shower pans, a flood test may be performed. This involves plugging the drain and filling the shower floor with water to check for leaks over a 24-hour period.
Once the membrane is fully cured and has passed inspection, you can begin the tile installation. Do not rush the drying process. A premature tiling job can puncture the membrane and ruin the waterproofing layer.
Special Considerations for Floors and Bathtubs
Waterproofing a shower is a priority, but floors and bathtubs also need attention. For bathroom floors, a liquid membrane applied over the subfloor is an excellent way to prevent water from a leaky toilet or a spilled bucket from seeping into the ceiling below. This is especially important if your bathroom is on a second floor. The membrane is painted over the entire floor surface and up the walls a few inches, creating a catch basin.
For bathtubs, the waterproofing must start at the flange. The tub's tile-in flange is a lip that sits against the wall. The cement board should overlap this flange, leaving a small gap. This gap is then filled with a flexible sealant, and the waterproofing membrane is applied over the board and down to the tub surface, creating a watertight seal. This prevents water from running behind the tub through the joint.
Common Waterproofing Mistakes to Avoid
Even with the best materials, mistakes during installation can compromise the entire system. Being aware of these common pitfalls can save you from significant headaches later.
- Insufficient coats: Applying only one thin coat of liquid membrane instead of the required two or three.
- Ignoring the corners: Failing to reinforce inside and outside corners where cracks commonly occur.
- Sealing the drain incorrectly: Not using the proper waterproofing boot or sealant around the drain flange, creating a direct leak path.
- Using drywall in wet areas: Installing regular drywall behind the tile in a shower or tub surround.
- Skipping the primer: Not using the recommended primer on some surfaces before applying the membrane, which can lead to adhesion failure.
Each of these mistakes can lead to water damage that becomes visible only months or years after the remodel is complete. The cost of tearing out and replacing tiles to fix a waterproofing failure is far greater than the cost of doing the job correctly from the start.
Why Professional Installation Is Worth It
Waterproofing is a specialized skill. It requires attention to detail, knowledge of building codes, and experience with different material systems. A small mistake, such as a missed spot on a fastener or a seam that is not fully sealed, can lead to a catastrophic failure. Hiring a licensed and experienced contractor who is familiar with current waterproofing standards is an investment in your home's longevity.
When you request a project through a platform like Repairmen, you can compare vetted professionals who have the right expertise for your bathroom remodel. They can also help you navigate local building codes, which often specify minimum waterproofing requirements. A professional will also provide a warranty for their workmanship, giving you recourse if a problem arises. Furthermore, a proper installation will protect your home's structure, which is far more valuable than the cost of the labor itself. Taking the time to find a qualified pro is a step you will not regret.
Budgeting for Quality Waterproofing
Many homeowners are tempted to cut corners on waterproofing to save a few hundred dollars. This is a false economy. The average cost to repair a leaking shower can range from several thousand dollars to over ten thousand, depending on the extent of the damage. In contrast, upgrading from a basic paint-on membrane to a premium sheet membrane system might only add a few hundred dollars to your project's total cost. This is one area where spending more upfront guarantees significant savings in the long run.
When reviewing bids from contractors, ensure that waterproofing is a clearly defined line item. Ask about the specific products they will use and their installation method. A reputable contractor will be transparent about their process. Remember that a low bid might exclude critical waterproofing steps. When you compare estimates, focus on the value and the long-term protection you are getting, not just the bottom line. Protecting your investment with professional waterproofing is the smartest money you can spend on your bathroom remodel.
Ultimately, the success of your bathroom remodel hinges on the invisible work behind the tile. By prioritizing these waterproofing techniques, you are not just creating a beautiful space; you are building a fortress against one of your home's most persistent threats. With the right materials, professional installation, and a solid understanding of the process, you can enjoy your new bathroom for decades, free from the worry of water damage.
Learn more about Bathroom Remodel for guides, costs, and what to expect.
Compare Bathroom Remodel Pros Near You
Enter your ZIP code to compare top-rated local professionals and request free quotes.