
Winterizing Home Plumbing to Prevent Burst Pipes
Winterizing home plumbing to prevent burst pipes protects your walls, floors, and wallet. Here is the fall routine that keeps water flowing all winter.

By Elena John
Learn more about Plumbing Pipe Repair for guides, costs, and what to expect.
Compare Plumbing Pipe Repair Pros Near You

Enter your ZIP code to compare top-rated local professionals and request free quotes.
The first hard freeze of the season has a way of exposing every weak point in a home's plumbing system. A single split copper pipe can release hundreds of gallons of water into your walls, ceilings, and floors before anyone notices, and the resulting damage often costs thousands of dollars to repair. According to the Insurance Institute for Business and Home Safety, water damage from burst pipes is one of the most common and costly claims homeowners file each winter. The good news is that winterizing home plumbing to prevent burst pipes is a manageable project that most homeowners can complete in a single weekend, and it costs far less than the average insurance deductible.
Water expands by roughly nine percent when it freezes, and that expansion creates pressure that no residential pipe is designed to withstand. Pipes do not usually burst at the point where ice forms; they split downstream, where the trapped water has nowhere to go. That is why a frozen pipe in an unheated crawl space can flood a finished basement on the opposite side of the house. Understanding that mechanism helps you prioritize the vulnerable spots in your own home instead of treating every pipe the same way.
This guide walks through the full winterization process, from identifying at-risk pipes to insulating, draining, and sealing your home against cold snaps. It also covers what to do when temperatures drop unexpectedly, when to call a licensed plumber, and how to protect your budget if the worst happens anyway.
Why Winterizing Home Plumbing to Prevent Burst Pipes Matters More Than Ever
Homeowners sometimes assume that newer construction is immune to freezing problems. In reality, modern homes are often more vulnerable because builders route plumbing through exterior walls, attic spaces, and unheated garages to save on materials and maximize living space. Any pipe that runs through an unconditioned zone is a candidate for freezing once outdoor temperatures fall below roughly 20 degrees Fahrenheit, and wind chill accelerates the process by pulling heat out of exposed materials.
The financial stakes are substantial. A burst supply line can discharge several gallons per minute, and even a small pinhole leak behind drywall can saturate insulation, warp hardwood floors, and feed mold colonies within 48 hours. Beyond the repair bill, homeowners face the disruption of living in a construction zone during the coldest months of the year. Taking a few preventive steps in fall is almost always cheaper and less stressful than managing an emergency restoration project in January.
There are several risk factors that increase the likelihood of a freeze event. If any of these apply to your home, treat winterization as a priority rather than an optional chore:
- Pipes located in crawl spaces, attics, garages, or along exterior walls
- Homes that sit vacant for extended periods during winter
- Older plumbing with little or no insulation wrap
- Previous freeze incidents, which often signal a recurring weak point
- Outdoor spigots, sprinkler lines, and pool equipment that were not drained in fall
Each of these conditions gives cold air a direct path to your water lines. The fix is rarely complicated, but it does require knowing where your pipes run and which ones see the least indoor heat. A walk-through with a flashlight before the first frost will reveal most of the problem areas.
Start With a Full Plumbing Inspection Before the First Frost
Winterization works best when it begins with a clear picture of your system. Set aside an hour to trace the path of every supply and drain line in the house. Start at the main water shutoff, then follow the pipes through the basement, crawl space, attic, and any wall cavities you can access. Note where each line runs relative to exterior walls and insulation. Pay special attention to pipes under kitchen and bathroom sinks along outside walls, since cabinet doors often block the flow of warm indoor air.
As you inspect, look for existing damage that cold weather will make worse. Small drips, corroded fittings, and cracked supply lines should be repaired before temperatures drop. A pinhole leak that seems harmless in October can become a major rupture when the water inside it freezes. If you are planning a larger project, such as moving a sink or adding a fixture, our kitchen remodel plumbing requirements guide explains how to plan the layout so new lines stay inside heated space.
Homeowners who are not comfortable crawling through tight spaces or shutting off the main water supply should bring in a professional for this inspection. A licensed plumber can identify vulnerable runs, check water pressure, and recommend insulation or rerouting options. If you need help finding a qualified local pro, platforms such as Repairmen connect homeowners with vetted plumbing and repair specialists across the country, which is especially useful when you need same-week service before a cold front arrives.
Insulating Pipes and Sealing Cold Air Entry Points
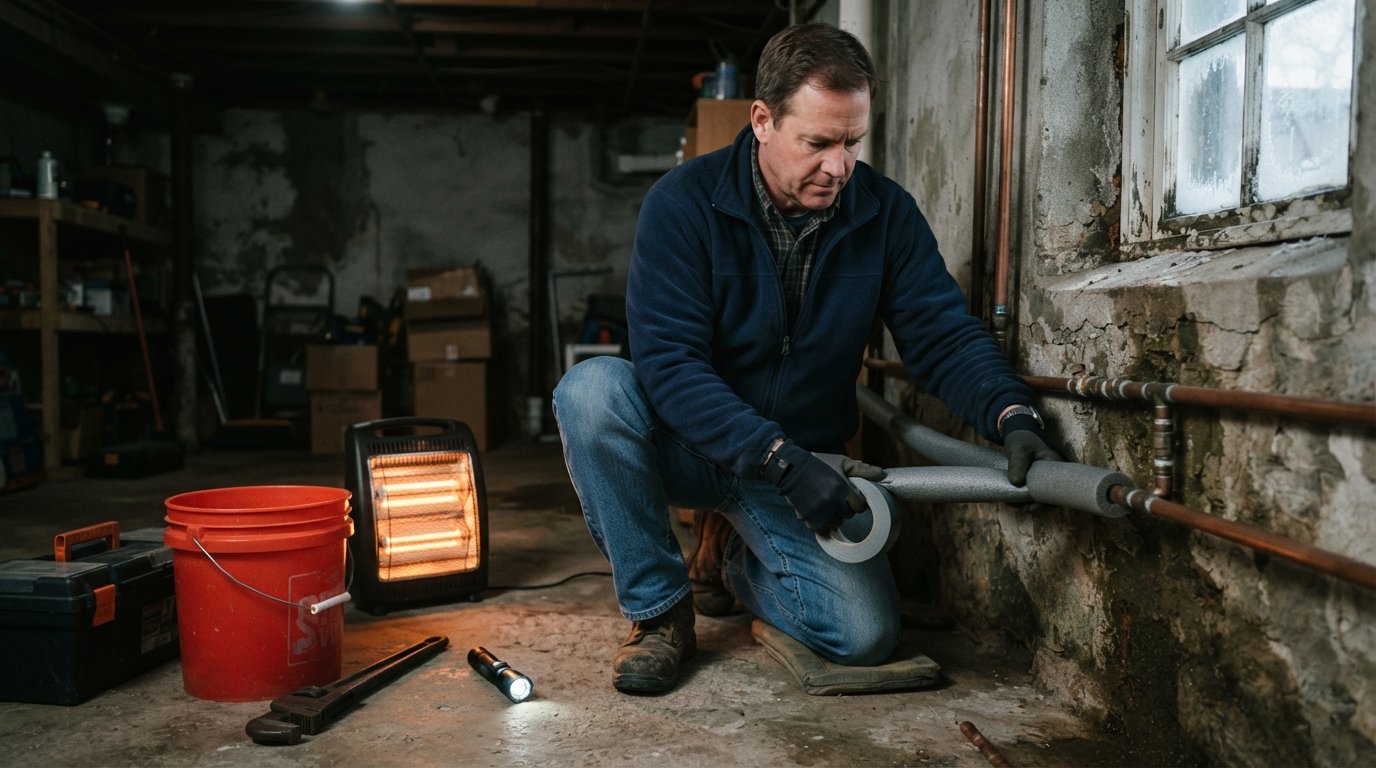
Insulation is the workhorse of any winterization plan. Foam pipe sleeves, fiberglass wrap, and self-regulating heat cable each serve different situations. Foam sleeves are inexpensive and effective for straight runs in crawl spaces and basements. Heat cable is better for pipes that cannot be moved out of an unheated zone or that have frozen before. Whichever product you choose, the goal is the same: keep the water inside the pipe above freezing even when the surrounding air drops well below it.
Insulation only works if cold air stays outside. Gaps around foundation vents, dryer vents, cable penetrations, and hose bibs let frigid air wash over pipes that would otherwise stay warm. Seal these openings with caulk, spray foam, or rigid foam board. In crawl spaces, close foundation vents for the winter and reopen them in spring to control moisture. In attics, make sure insulation does not block soffit vents, since proper attic ventilation prevents ice dams even as it keeps the roof deck cold.
Outdoor components deserve their own checklist before the first freeze. A few minutes of preparation here prevents some of the most expensive and common winter failures:
- Disconnect garden hoses and store them indoors.
- Shut off the interior valve that feeds each outdoor spigot, then open the spigot to drain remaining water.
- Blow out sprinkler and irrigation lines with compressed air, or hire a service to do it.
- Drain and store pool equipment, or run it through winter according to the manufacturer's instructions.
- Install insulated covers on exposed hose bibs and foundation vents.
These steps remove standing water from the most exposed parts of the system. Once they are complete, the remaining risk is concentrated indoors, where insulation and heat management can handle it.
Managing Indoor Heat and Water Use During Cold Spells
Even a well-insulated home depends on a minimum level of indoor warmth to keep pipes safe. During a cold snap, keep the thermostat set to at least 55 degrees Fahrenheit, day and night, even when you are away. The small additional heating cost is trivial compared with the price of water damage restoration. If you leave for vacation, ask a neighbor to check the house or install a smart thermostat that alerts you if indoor temperatures fall below a set threshold.
Open cabinet doors under sinks that sit against exterior walls so warm air can circulate around the pipes. During especially cold nights, let a pencil-thin stream of water run from the faucet served by the most vulnerable line. Moving water freezes much more slowly than still water, and the cost of that trickle is a few cents per night. For pipes in garages or crawl spaces, a small space heater with a thermostat and automatic shutoff can add a margin of safety, provided it is placed away from combustible materials and never left unattended for long periods.
Knowing where your main shutoff valve is located, and confirming that it turns freely, is one of the most valuable preparations you can make. If a pipe does burst, every minute the water runs adds to the damage. Label the valve, teach every adult in the household how to use it, and keep a note of your plumber's emergency number in the same place.
Vacant Homes, Vacation Properties, and Extended Absences
Unoccupied homes are the most common setting for catastrophic freeze damage because no one is present to notice a drop in temperature or a leaking pipe. If your home will sit empty for more than a few days in winter, take stronger measures than you would for an occupied house. The two main strategies are maintaining heat and draining the system entirely.
If you keep the heat on, set the thermostat no lower than 55 degrees, install temperature monitoring that sends alerts to your phone, and arrange for someone to walk through the property weekly. If the home will be empty for the entire season, or if you cannot guarantee reliable heat, a professional winterization that drains all water lines and adds nontoxic antifreeze to traps is the safer route. This service typically costs a few hundred dollars and eliminates freeze risk almost entirely.
Insurance policies often include conditions about vacancy, so review your coverage before leaving a home empty for an extended period. Some carriers reduce or deny claims when a property has been unoccupied beyond a set number of days without proper precautions. Documenting your winterization steps, with photos and receipts, can help if you ever need to file a claim.
What to Do When a Pipe Freezes or Bursts
If you turn on a faucet during cold weather and nothing comes out, or only a trickle appears, assume the line is frozen. Leave the faucet open, because melting water needs somewhere to go, and apply gentle heat to the affected section using a hair dryer, heat lamp, or wrapped towels soaked in hot water. Never use an open flame or a high-output torch, which can ignite surrounding materials and crack the pipe. Work from the faucet end back toward the frozen section so melted water can escape.
If a pipe has already burst, shut off the main water valve immediately, then open the lowest faucet in the house to drain the remaining water and relieve pressure. Move furniture and electronics away from the leak, document the damage with photos, and call a licensed plumber. For significant water intrusion, a restoration company may also be needed to dry the structure and prevent mold. Contact your insurance provider early, since most policies require prompt reporting and mitigation to keep the claim valid.
After the emergency is resolved, treat the incident as a diagnostic clue. The pipe that failed is telling you exactly where your winterization plan fell short. Add insulation, reroute the line, or install heat cable before the next cold season, and the same problem is unlikely to repeat.
Building Winterization Into Your Annual Maintenance Routine
The homeowners who avoid burst pipe disasters are rarely the ones who spend the most money. They are the ones who repeat a simple routine every fall. A basic checklist takes an afternoon and covers the vast majority of risk: inspect exposed pipes, insulate vulnerable runs, seal air leaks, disconnect hoses, drain outdoor lines, test the main shutoff, and confirm the heating system is serviced. Scheduling the work in early autumn, before the first freeze warning, removes the scramble that leads to rushed decisions and missed steps.
For homeowners who would rather hand off the entire project, hiring a licensed plumber for a winterization service is a reasonable investment, especially in older homes with complicated plumbing layouts. If you also have larger renovation plans on the horizon, combining winterization with a pre-project plumbing inspection can surface issues before they become change orders. When you are ready to compare local professionals and request free estimates for plumbing work, using a platform that pre-screens contractors saves time and reduces the risk of hiring an unqualified pro.
Winter does not have to mean living under the threat of burst pipes. With insulation, a little heat management, and a set routine, your plumbing can ride out even a severe cold snap without drama, and you can spend the season focused on everything except water damage repairs.