
Best Insulation Types for Existing Homes: 2026 Comparison
Compare retrofit insulation options for older homes and their R-values. Call (833)-211-1668 to connect with local insulation contractors and request free quotes.

By Claire Shaw
Learn more about Insulation Installation or Upgrade for guides, costs, and what to expect.
Compare Insulation Installation or Upgrade Pros Near You

Enter your ZIP code to compare top-rated local professionals and request free quotes.
If your home feels drafty in winter and stifling in summer, the insulation behind your walls is probably underperforming. Upgrading insulation is one of the highest-return energy improvements a homeowner can make, but retrofitting an existing house is not the same as insulating new construction. You are working around finished walls, existing wiring, plumbing, and attic obstructions, which means the best insulation type for your neighbor's new build may be a poor fit for your 1960s ranch. This guide compares the leading retrofit options, blown-in fiberglass and cellulose, batt insulation, spray foam, and rigid board, so you can match the material to your wall and attic structures, understand R-value and moisture tradeoffs, and scope the work before you request installer quotes.
Why Retrofitting Insulation Is Different From New Construction
In a new build, insulation goes in before drywall, so installers can wrap cavities completely and seal every penetration. In an existing home, most of the building envelope is hidden. That changes everything about material selection. You need products that can be installed through small access holes, blown behind finished surfaces, or applied to exposed attic floors and rim joists without tearing the house apart.
Retrofit projects also run into real-world obstacles: knob-and-tube wiring that cannot be buried, recessed lights that require clearance, old plaster walls that crack when disturbed, and moisture problems that insulation can worsen if ignored. A smart comparison therefore weighs installation method and risk as heavily as R-value per inch. The goal is a continuous, well-sealed thermal boundary you can actually achieve in an occupied home, not a theoretical assembly that looks perfect on paper.
Finally, existing homes rarely have a single insulation type throughout. A practical upgrade often combines methods: blown-in cellulose in the attic, spray foam at the rim joists, and dense-packed fiberglass in walls. Treat this comparison as a menu, not a single-choice decision.
Blown-In Fiberglass and Cellulose: The Retrofit Workhorses
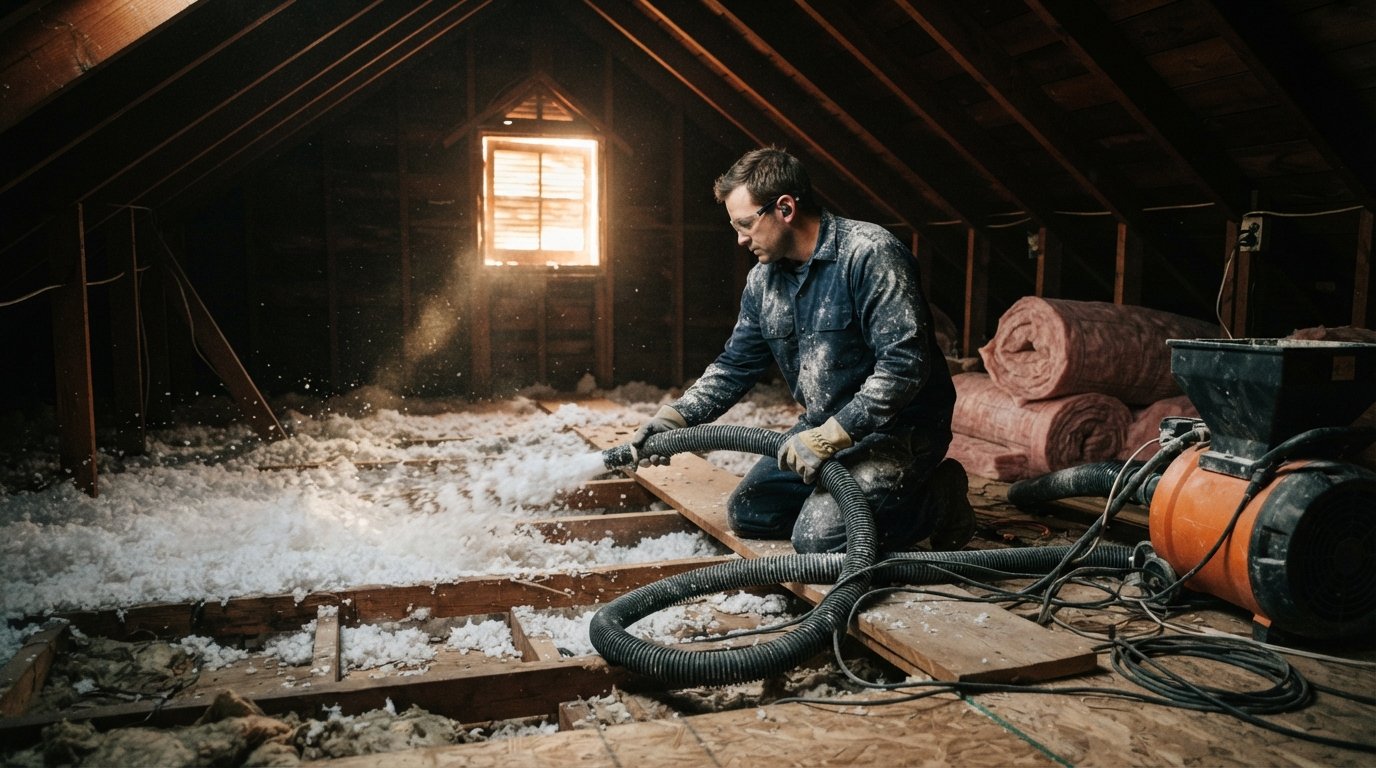
Blown-in insulation is the most common choice for existing homes because it installs through small holes and flows around obstructions. Fiberglass loose fill is spun glass; cellulose is recycled paper treated with fire retardants. Both are blown into attics, and both can be dense-packed into closed wall cavities through holes drilled from the exterior or interior.
Here is how the two compare on the factors homeowners care about most:
- R-value per inch: Fiberglass loose fill is roughly R-2.2 to R-2.7 per inch; cellulose is about R-3.1 to R-3.8, so cellulose packs more thermal resistance into the same cavity.
- Air sealing: Neither material is a true air barrier, but dense-packed cellulose limits airflow better than loose fiberglass, which is why air sealing should always precede blowing in either product.
- Moisture behavior: Cellulose can absorb and release moderate moisture, while fiberglass sheds water but loses performance when wet and compacts if saturated.
- Settling: Both settle over time; cellulose settles less when dense-packed, and attic fiberglass should be installed slightly above the target depth to compensate.
- Cost: Both are among the most budget-friendly retrofit options, with fiberglass typically the cheaper material and cellulose costing somewhat more.
For attics, blown-in is almost always the fastest and most cost-effective upgrade. For walls, dense-packed cellulose or fiberglass is the go-to solution when you want to avoid demolition. The catch is that blown wall insulation requires drilling holes every 16 inches between studs (often through exterior siding or interior drywall), then patching and repainting. On brick or stucco exteriors, that patching is more involved, which affects the total installed cost even though the material itself is inexpensive.
One more consideration: older homes with balloon framing can allow blown insulation to fall through wall cavities into the basement. Installers use blocking or dense packing to prevent this, so ask how they plan to handle it during your quote walkthrough.
Batt Insulation: Best for Accessible Cavities and Partial Retrofits
Batt insulation, sold in pre-cut blankets of fiberglass or mineral wool, is what most people picture when they think of insulation. In retrofits, batts are rarely the best choice for closed walls, but they shine in specific scenarios: exposed attic floors where you can lay them yourself, open cavities created during a remodel, knee walls, and garage ceilings.
Mineral wool batts deserve special attention for existing homes. They are denser than fiberglass, naturally resist moisture and mold growth, and hold their shape better in irregular cavities. They also dampen sound, which matters in interior walls. Fiberglass batts are cheaper and easier to cut, but they perform poorly if installed with gaps, compression, or gaps around wiring, all common mistakes in do-it-yourself retrofits.
Where batts fall short is air sealing. Batts do not stop air movement, and in an existing home, air leakage through gaps, top plates, and penetrations can waste a large share of your heating and cooling dollars. If you install batts in an attic, pair them with careful air sealing (foam around penetrations, weatherstripping on the hatch) and consider adding blown-in material on top to reach current recommended R-values. Many older attics have only R-11 to R-19; modern recommendations for most climates run from R-38 to R-60, so a simple batt top-up is often insufficient on its own.
Spray Foam: Maximum Sealing for Hard-to-Reach Areas
Spray polyurethane foam is applied as a liquid that expands and hardens, creating both insulation and an air barrier in one step. For retrofits, it is most valuable in places where other materials cannot reach or seal: rim joists in basements, band joists, attic penetrations, and irregular cavities around chimneys and dormers. Closed-cell foam offers roughly R-6 to R-7 per inch and acts as a vapor retarder; open-cell foam offers about R-3.5 per inch and is more vapor-permeable.
Spray foam is not usually the right whole-house solution for an existing home because of cost and disruption. Installing it in finished walls requires opening the walls, and closed-cell foam in particular is significantly more expensive per square foot than blown-in alternatives. There are also safety considerations: two-component foam must be installed by trained professionals with proper equipment, and older homes may need interior access that triggers drywall repair and repainting.
The best use of spray foam in a retrofit is targeted. A common high-value package is closed-cell foam at the rim joist, open-cell or closed-cell foam around attic penetrations and kneewall transitions, and blown-in insulation everywhere else. This hybrid approach captures most of the air-sealing benefit without paying foam prices for the entire envelope. Ask contractors whether they use foam as part of a whole-home plan or as a spot treatment, and get the R-value and thickness in writing.
Rigid Board: Thin, Tough, and Useful in Specific Spots
Rigid foam boards (polyisocyanurate, extruded polystyrene, and expanded polystyrene) deliver high R-value in thin profiles: polyiso reaches about R-6 per inch, XPS about R-5, and EPS about R-4. In retrofits, rigid board is used on basement walls, exterior walls during siding replacement, garage ceilings, and as a continuous layer to break thermal bridging through studs.
For finished interior walls, rigid board is rarely a direct retrofit option because it must be installed on a surface, which means removing drywall or adding a furring layer that reduces room dimensions. Its real value in existing homes shows up in two projects: finishing a basement (where foam board glued to masonry walls with taped seams creates a continuous barrier) and re-siding, where a layer of rigid board over the sheathing dramatically improves wall performance. If you are already planning exterior work, adding rigid insulation at that time is far cheaper than a standalone project.
One caution: rigid foam is a vapor retarder or barrier depending on type and thickness, so it can trap moisture against foundation walls or sheathing if installed incorrectly. Follow local code and manufacturer guidance, and have the contractor explain the drying path of each assembly.
Which Insulation Works for Finished Walls Without Major Demolition?
This is the question that decides most retrofit projects. If you are not opening walls, your realistic options are dense-packed blown-in fiberglass or cellulose, injected foam products designed for cavity fill, and in some cases exterior rigid board during siding work. Here is how to think about each:
- Dense-packed cellulose or fiberglass: The default choice for finished walls. Holes are drilled between studs, material is packed to a controlled density, and holes are patched. Works on most wood-frame walls and is the most cost-effective path to a full wall upgrade.
- Injection foam: Two-component foam injected into cavities expands to seal gaps. Higher cost, but excellent air sealing and suitable for irregular cavities; best for smaller areas or where air leakage is severe.
- Exterior rigid board: Only practical when siding is being replaced, but it adds continuous R-value and reduces thermal bridging without touching interior finishes.
- Interior rigid board or batt with furring: Requires removing drywall or losing interior space, so it is usually reserved for gut renovations or rooms being remodeled anyway.
Before choosing, verify what is already in the wall. Homes built before 1950 may have no insulation at all; homes from the 1950s through 1970s often have thin batts or none; 1980s and 1990s homes may have R-11 to R-13 batts that have settled or been bypassed by air leaks. A contractor can inspect through an outlet box or a small test hole. Also check for knob-and-tube wiring, which must be addressed before any cavity fill, and for aluminum branch wiring in 1960s and 1970s homes.
If your walls are solid masonry (brick or stone without a cavity), blown-in wall insulation is not an option. In that case, focus on attic and basement air sealing plus interior or exterior rigid board during any renovation, and consider insulating the attic roof line instead of the floor if you want to condition the space.
R-Value, Moisture, and Air Sealing: The Comparison That Actually Matters
R-value measures resistance to heat flow, but in an existing home, air leakage and moisture control often matter more than the number printed on the bag. A wall with R-13 batts and unsealed top plates can perform worse than an R-11 wall that has been air sealed. That is why every insulation quote should include an air-sealing scope, not just a material and R-value.
Moisture is the second critical factor. Insulation does not create water problems, but it can hide them. Before adding insulation to a basement, crawlspace, or wall with a history of dampness, fix the water source: grade, gutters, downspouts, and foundation drainage. In cold climates, adding interior insulation to a wall can make the sheathing colder and increase condensation risk, so a vapor retarder strategy must be planned. In hot-humid climates, the priorities flip, and vapor barriers on the interior can trap moisture. Local code and climate zone guidance should drive the decision, and a good contractor will explain the drying direction of each assembly.
Air sealing itself is inexpensive and high-impact. Common targets include attic penetrations (wiring, plumbing, chimneys with proper clearance), top plates, recessed lights rated for insulation contact, rim joists, and window and door frames. Sealing these before blowing in attic insulation can improve comfort immediately and is often the best dollar-for-dollar upgrade in the entire project.
For a quick comparison of the main materials on the factors that drive retrofit decisions:
- Blown-in cellulose: Best balance of cost, R-value per inch, and wall retrofit capability; requires patching holes.
- Blown-in fiberglass: Cheapest material; lower R-value per inch; good for attics; less effective at limiting airflow than cellulose.
- Batts (fiberglass or mineral wool): Best for open cavities and DIY attic work; poor air sealing; performance depends heavily on installation quality.
- Spray foam: Best air sealing and highest R-value per inch; highest cost; best used strategically rather than whole-house.
- Rigid board: Best for basements, exterior walls during siding, and continuous insulation; not a finished-wall retrofit solution.
How to Scope the Work and Compare Installer Quotes
Insulation quotes vary widely because scope varies widely. Two bids for the same attic can differ by thousands of dollars depending on whether air sealing, baffles, hatch insulation, and removal of old material are included. To compare fairly, ask every contractor to itemize the same set of line items and to state target R-values, material types, and square footage.
Use this checklist when reviewing bids:
- Air sealing scope: which penetrations, top plates, rim joists, and hatch are included, and with what materials.
- Existing insulation: removal, disposal, or topping up, and how settling is accounted for.
- Ventilation: attic baffles at eaves, bath fan and dryer venting, and combustion appliance clearance.
- Wall access: number of holes, patching and painting responsibility, and exterior finish repair.
- Safety: knob-and-tube or aluminum wiring handling, recessed light clearance, and any required permits.
- Warranty and verification: workmanship warranty length and whether a blower door test before and after is included.
A blower door test is worth requesting. It measures whole-house air leakage before and after the work, giving you an objective performance number rather than a promise. Some utilities offer rebates tied to verified air sealing and insulation improvements, so ask contractors about available incentives and whether they handle the paperwork.
For larger or multi-trade projects, such as insulation combined with attic ventilation, HVAC duct sealing, or window replacement, it helps to work with a platform that pre-vets local contractors and lets you request multiple free quotes in one place. Services like Contractor.Homes connect homeowners with local professionals and provide project guides, which makes it easier to compare bids for the same scope instead of apples-to-oranges estimates. Whether you use a marketplace or hire directly, insist on licensed and insured contractors and get at least three written quotes for any project beyond a simple attic top-up.
Timing also matters. Insulation work is easiest before other projects: before finishing a basement, before re-siding, before a kitchen remodel that opens walls. If you are planning any of those, bundle the insulation upgrade into the same project to avoid paying twice for access and patching.
Matching the Material to Your Home
The best insulation type for an existing home depends on where the cavity is and how much disruption you can tolerate. As a practical starting point: blown-in cellulose for attics and finished walls, mineral wool or fiberglass batts for open cavities and garage ceilings, targeted spray foam at rim joists and penetrations, and rigid board for basements and exterior walls during siding replacement. Most whole-home retrofit plans combine two or three of these rather than relying on one.
Before you sign anything, confirm the scope in writing, verify licensing and insurance, and ask how the contractor will protect your home during drilling and blowing. A well-scoped insulation project typically pays back through lower energy bills, better comfort, and improved resale appeal, but only when air sealing and moisture control are treated as part of the job rather than an afterthought.