
When to Replace Windows for Energy Efficiency: A Homeowner Guide
Decide when to replace windows for energy efficiency with clear signs, ratings by climate, and payback facts. Call (833)-211-1668 for free quotes.

By Sophie Reed
Learn more about Window Installation for guides, costs, and what to expect.
Compare Window Installation Pros Near You

Enter your ZIP code to compare top-rated local professionals and request free quotes.
Your windows are failing you. You can feel it on the coldest nights, when a subtle draft pushes past the frame and the glass sweats while your furnace works overtime. But before you sign a contract for a full replacement, you need to separate the real energy losers from the windows that just need a little attention. The question of when to replace windows for energy efficiency is rarely black and white. It sits at the intersection of comfort, cost, and climate, and the answer depends on how your current windows perform, what you can fix yourself, and what kind of payback you can realistically expect. This guide walks you through the signs that matter, the ratings that count in your region, and the installation details that determine whether new windows actually deliver the savings you were promised.
Failing Windows Versus Fixable Problems: How to Tell the Difference
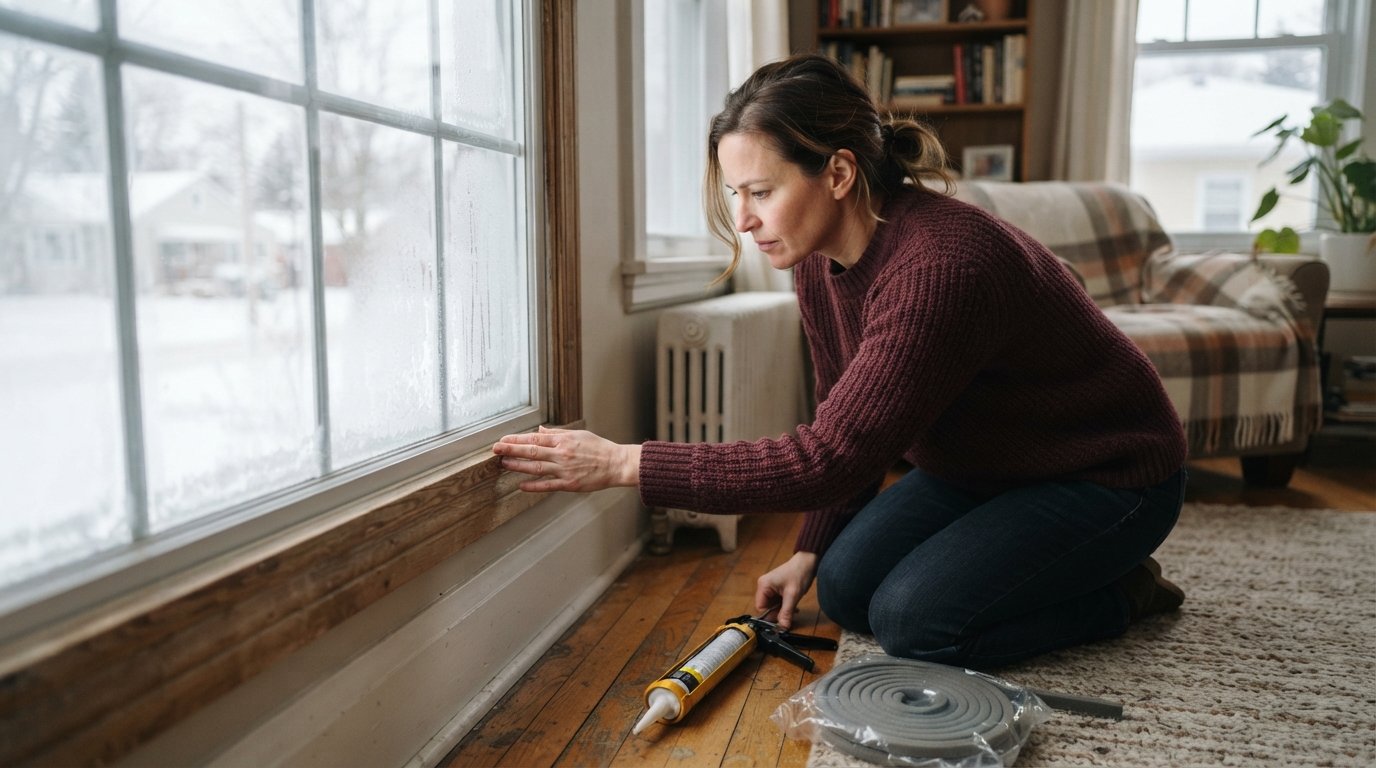
Not every drafty window needs to be torn out and replaced. Many homeowners jump straight to replacement when a few hours of weatherization would solve the problem for a fraction of the cost. The first step in deciding when to replace windows for energy efficiency is a honest assessment of what is actually failing. A window that rattles in the wind or lets in a thin ribbon of cold air around the sash may simply need new weatherstripping, fresh caulk, or a latch adjustment. These are maintenance items, not replacement triggers, and they can restore a surprising amount of comfort for under a hundred dollars.
True failure looks different. It is structural, permanent, or widespread. Here are the signs that usually justify replacement rather than repair:
- Condensation between the panes: If you see fog or water droplets trapped inside a double-pane or triple-pane unit, the seal has failed. The insulating gas has escaped, and the window is now performing closer to a single pane. This cannot be fixed without replacing the glass unit or the whole window.
- Rot or softness in the frame: Wood windows that feel spongy, crumble when probed, or show visible decay around the sill and jambs have compromised structure. Patching rot is temporary, and the damage often extends behind the trim.
- Visible cracks in the glass or frame: A cracked pane is a safety issue and an energy leak. Cracked frames, whether vinyl or wood, cannot be reliably sealed.
- Windows that no longer close or lock properly: If the sash is warped or the frame has shifted so the window will not seal, air infiltration becomes unavoidable. This is common in older homes where the frame has settled.
- Single-pane glass throughout the house: A single pane of glass has virtually no insulating value. If your home still has original single-pane windows and you live in a climate with real winters or harsh summers, replacement is usually the only path to meaningful efficiency gains.
If you check none of these boxes and your windows are merely drafty, start with air sealing and weatherstripping. Caulk around the exterior trim, add foam gaskets behind outlet covers on exterior walls, and replace worn weatherstripping on the sashes. This is the cheapest energy upgrade you can make, and it often closes the gap enough that replacement can wait. The U.S. Department of Energy consistently ranks air sealing as one of the highest-value efficiency improvements per dollar spent, and it should always come before a window replacement project.
The Payback Reality: Window Replacement Versus Air Sealing
Homeowners often assume that new windows will pay for themselves through lower energy bills. The reality is more nuanced. Window replacement is a long-term investment in comfort, appearance, and durability, but the energy savings alone rarely justify the full cost. Studies of replacement window payback periods typically find that it takes decades to recoup the expense through utility savings, especially in mild climates. That does not mean replacement is a bad idea, but it does mean you should go into the project with clear expectations. New windows can reduce heat loss and gain, but the envelope of your home (attic insulation, air sealing, ductwork) usually offers a faster return.
The most effective strategy is to treat air sealing as the first step and window replacement as the second. If you seal the obvious leaks first, you may find that the remaining discomfort is concentrated around a few genuinely failing windows. Replacing only those units, rather than the whole house, can deliver a better balance of cost and comfort. This targeted approach is especially sensible if some windows have already been updated and others have not. A room-by-room assessment helps you prioritize the worst performers, typically the windows on the windward side of the house or those in rooms that are always too hot or too cold.
For homeowners who want to move forward with replacement, getting competitive quotes is the best way to understand local pricing and avoid overpaying. A platform like Contractor.Homes connects homeowners with pre-vetted local contractors and provides free quote requests for window replacement and other efficiency projects. Comparing multiple bids side by side helps you spot inflated labor charges and ensures you are paying a fair market rate for installation quality. It also gives you leverage to ask the right questions about efficiency ratings and installation methods, which we cover next.
Which Efficiency Ratings Matter in Your Climate Zone
Window ratings are not one-size-fits-all. The same window that performs well in Miami may be a poor choice in Minneapolis. The National Fenestration Rating Council (NFRC) label provides the key metrics, but the values you should prioritize depend on where you live. Understanding the climate zone map used by Energy Star and building codes helps you narrow your options before you ever talk to a contractor. The four metrics on every NFRC label are U-factor, Solar Heat Gain Coefficient (SHGC), Visible Transmittance (VT), and Air Leakage (AL).
- U-factor: Measures how well the window insulates. Lower is better. In cold climates, look for a U-factor of 0.30 or lower, and consider 0.25 or better for premium performance.
- Solar Heat Gain Coefficient (SHGC): Measures how much solar heat passes through the glass. Lower numbers block more heat. In hot climates, aim for 0.25 or lower to reduce cooling loads. In cold climates, a higher SHGC (0.40 or above) can allow useful passive solar gain, though modern low-e coatings often balance this.
- Visible Transmittance (VT): Measures how much daylight comes through. Higher is brighter. This is a comfort and aesthetic choice, but do not sacrifice VT too much for efficiency in living spaces.
- Air Leakage (AL): Measures how much air escapes through the frame and sash. Lower is better, and 0.3 or below is a good target. This metric is often overlooked but is critical for real-world performance.
Climate zone matters because the trade-offs between heating and cooling dominate different regions. In northern zones, prioritize low U-factor and moderate SHGC to keep heat in during winter. In southern zones, prioritize low SHGC to block heat gain, even if the U-factor is slightly higher. In mixed climates, look for a balance, such as U-factor around 0.30 and SHGC around 0.30 to 0.35. Energy Star maintains a climate zone map that lists the recommended ratings for each region, and it is worth checking before you shop. The ratings on the label are only useful if they match your climate, so do not let a contractor sell you a window optimized for the wrong region.
Installation Quality: The Factor That Makes or Breaks Efficiency
Even the highest-rated window will underperform if it is installed poorly. Gaps around the frame, inadequate flashing, and compressed insulation can turn a premium window into a drafty liability. This is why the questions you ask a contractor about installation are just as important as the ratings on the glass. A proper installation includes sealing the rough opening, insulating the gap between the frame and the wall, and flashing the exterior to shed water. Skipping these steps leads to air infiltration and, eventually, water damage.
When you interview window contractors, ask specific questions about their installation process. Do they use spray foam or fiberglass insulation around the frame? How do they handle flashing and water management? Will they remove the old window completely or use a pocket replacement that leaves the original frame in place? Pocket replacements are faster and cheaper, but they can leave hidden gaps and are not appropriate if the existing frame is damaged. A full-frame replacement is more invasive but delivers better long-term performance when done correctly. Ask for a written scope of work that details the sealing and flashing steps, and do not accept vague assurances. The difference between a good and a bad installation often comes down to a few tubes of sealant and a roll of flashing tape, but those details determine whether your new windows actually reduce energy loss.
It also helps to ask about warranties that cover installation labor, not just the window parts. A strong labor warranty signals that the contractor stands behind their workmanship. Finally, confirm that the contractor will pull the necessary permits and that the installation meets local energy codes. Codes have tightened in many states, and a permitted job protects you if something goes wrong. For homeowners who want to compare vetted local contractors and request free quotes for window replacement, Contractor.Homes offers a straightforward way to connect with professionals who understand these installation details.
A Step-by-Step Framework for Deciding When to Replace
If you are still on the fence, use this simple framework to make a confident decision. It moves from the cheapest fixes to the most expensive, so you can stop at the step that solves your problem. Start by assessing the actual condition of each window, then test the impact of weatherization, and only then consider replacement. This sequence ensures you do not spend thousands on new windows when a twenty-dollar tube of caulk would have done the job.
- Inspect every window for failure signs: Check for fog between panes, rot, cracks, and windows that no longer latch. Note which rooms are consistently uncomfortable.
- Weatherize and air seal first: Caulk exterior trim, replace weatherstripping, add outlet gaskets, and seal any obvious gaps. Live with the results for a full season.
- Evaluate remaining discomfort: If specific windows still cause drafts or condensation after sealing, those are your replacement candidates. Prioritize the worst performers rather than replacing every window at once.
- Get multiple quotes and ask about installation: Compare bids from at least three contractors, and ask each one to explain their sealing and flashing process in writing. Check ratings against your climate zone.
- Review payback expectations: Treat replacement as a comfort and durability investment, not a money-saving scheme. If the numbers do not work, consider interior storm windows or insulated blinds as a lower-cost interim step.
This framework keeps you from over-investing and helps you target your budget where it will make the biggest difference. It also gives you a clear story to tell contractors when you request quotes, which can lead to more accurate pricing and fewer surprises. Remember that replacement windows are a long-term purchase, and the quality of the installation matters as much as the product itself.
Final Thoughts on Timing and Value
Deciding when to replace windows for energy efficiency comes down to evidence, not guesswork. Look for failed seals, rot, and windows that no longer close, and rule out simple weatherization first. Understand that the energy payback is slow, so frame the project around comfort, appearance, and durability. Match efficiency ratings to your climate zone, and insist on a contractor who can explain exactly how they will seal and flash the installation. If you take those steps, you will avoid the common trap of spending a premium for windows that do not perform, and you will end up with a home that feels better and holds its value. When you are ready to compare local professionals, request free quotes from vetted contractors and make your decision with confidence.