
Debris Removal and Dumpster Planning for Home Renovation
Plan debris removal and dumpster rental for your renovation without budget surprises. Call 8332111668 for trusted local contractor quotes.

By Jack Dawson
Learn more about Dumpster Rental for guides, costs, and what to expect.
Compare Dumpster Rental Pros Near You

Enter your ZIP code to compare top-rated local professionals and request free quotes.
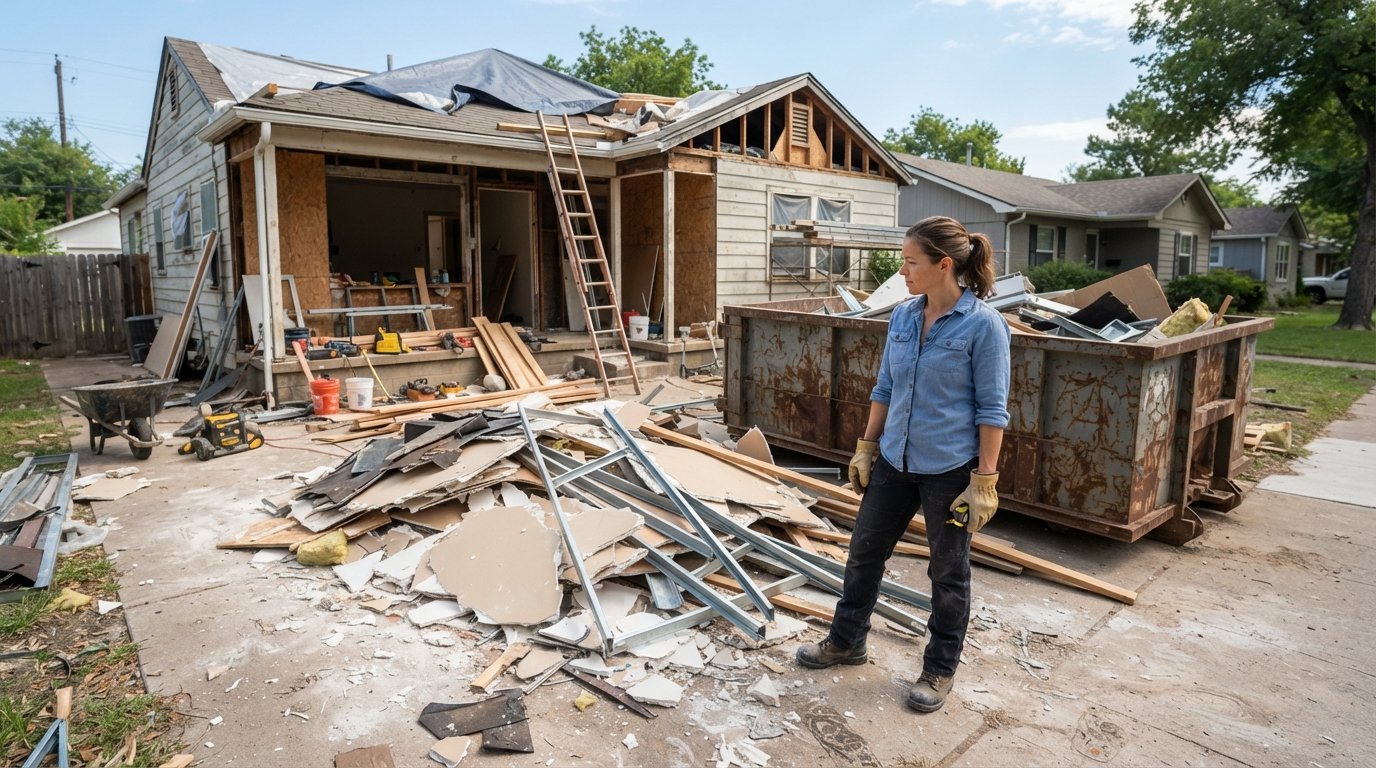
Your renovation is finally underway: the old cabinets are out, the tile is chipped away, and the bathroom wall is open. Then you look at the driveway. It is piled with broken drywall, twisted metal, and bags of cement. That moment, when the project is moving but the waste is winning, is where most homeowners lose time, money, and patience. Debris removal and dumpster planning for home renovation is not a glamorous topic, but it is the difference between a smooth build and a chaotic one. A dumpster that arrives late stalls your crew. A dumpster that is too small means mid-project hauling runs. A dumpster placed on a weak driveway can crack the concrete and create a repair bill bigger than the rental itself. Planning ahead turns this logistical headache into a predictable line item.
This guide walks you through sizing, permits, placement, timing, and cost control so you can keep the job site safe and your budget intact. You will also learn how to fold debris removal into your overall project budget, which is where many homeowners accidentally underplan. If you are still shaping your numbers, the smart home project budgeting tool can help you map waste hauling alongside labor and materials before you commit.
Why Debris Removal Deserves Its Own Line in Your Budget
Most homeowners build a renovation budget around materials and labor. Demolition waste often gets lumped into a vague contingency, and that is exactly where budgets spring leaks. Construction and demolition debris is heavy, bulky, and regulated in many municipalities. You cannot simply leave it at the curb. In some cities, putting construction waste in a residential trash bin is a code violation that carries fines. In others, the waste hauler will refuse the bin entirely and leave it sitting full for weeks. Planning debris removal as a separate budget line forces you to research local rules, estimate volume, and price the service before the first hammer swings.
A realistic debris line includes the dumpster rental, delivery and pickup fees, possible permit costs, and overage charges if you exceed the weight allowance. For a mid-sized bathroom remodel, that line might run a few hundred dollars. For a full kitchen gut or a roof tear-off, it can climb into the thousands. The number matters less than the fact that it exists on paper. When you request contractor quotes, ask each bidder how they handle debris. Some contractors include haul-away in their price. Others expect you to rent and manage the dumpster. Knowing which model you are comparing prevents the classic mistake of choosing the cheaper bid, then paying extra for waste removal out of pocket.
There is also a safety dimension. A job site cluttered with debris is a hazard. Nails in loose boards, shattered glass, and heavy chunks of concrete create trip and cut risks for everyone, including curious kids and pets. Timely removal keeps work areas clear and reduces the chance of injury or damage to finished surfaces. Insurance carriers also pay attention: if a visitor is hurt on a site that was obviously neglected, the claim conversation gets harder. Treat debris removal as part of your risk management, not just your cleanup.
How to Size a Dumpster for Your Renovation
Dumpster sizing is where guesswork gets expensive. Rent too small and you pay for a second haul or an extra swap. Rent too large and you pay for air. The right size depends on the scope of demolition, the materials involved, and how much you can compact or break down. As a general rule, heavier materials like concrete, brick, and soil require smaller containers because weight limits kick in long before volume does. Bulky but light materials like insulation, drywall, and cardboard fill space quickly but weigh less.
Here is a practical starting framework for common projects:
- Small bathroom refresh (tile, vanity, toilet, drywall): a 10 to 15 cubic yard dumpster is usually sufficient.
- Kitchen gut (cabinets, countertops, flooring, appliances): plan for a 15 to 20 cubic yard container.
- Roof tear-off (asphalt shingles): shingles are heavy, so a 10 to 15 cubic yard dumpster with a high weight allowance is often better than a large container that hits its limit early.
- Whole-home renovation or addition: multiple swaps of a 20 to 30 cubic yard dumpster, or a roll-off that stays on site with scheduled pickups.
These are starting points, not guarantees. The only reliable way to size correctly is to estimate volume material by material. Walk through the space and list what will be removed: flooring square footage, cabinet count, drywall sheets, fixtures, and exterior debris. Ask your contractor for a debris estimate in cubic yards. If the number sounds vague, press for detail. A contractor who has done fifty kitchens knows roughly how many yards a gut produces. That knowledge should be in the bid.
Weight limits deserve special attention. Most rental companies advertise a flat rate that includes a set tonnage, often one to two tons for smaller containers. Concrete, dirt, and shingles can blow past that limit fast. When you exceed it, you pay per ton overage, and those charges add up quickly. If your project involves masonry or roofing, ask specifically about heavy debris pricing before you book. Some companies offer dedicated heavy debris containers with lower sides and higher weight tolerances. Choosing the right container type is as important as choosing the right size.
Permits, Placement, and Neighborhood Rules
Before the dumpster lands in your driveway, confirm what your city or homeowners association requires. Many municipalities require a permit when a dumpster sits on a public street or sidewalk, and some require a permit even for private driveways in historic districts. Permit fees are usually modest, but fines for skipping them are not. A quick call to your local public works department or a check of the city website will tell you the rules. If you live in an HOA, review the covenants: some associations restrict dumpster placement, duration, or visibility from the street.
Placement is a balancing act between access and protection. The dumpster needs to be close enough for crews to load efficiently but far enough from the house to avoid damage if the truck swings wide during delivery. Consider these placement factors:
- Driveway strength: a fully loaded dumpster can weigh several tons. Asphalt driveways in summer heat are especially vulnerable to cracking. Use plywood under the container or place it on a gravel pad if you are unsure.
- Overhead clearance: check for power lines, tree branches, and cable wires. The delivery truck needs vertical space to tilt and drop the container.
- Access path: the truck needs a clear approach. Parked cars, narrow gates, and sharp turns can prevent delivery entirely.
- Distance from the work zone: too far and your crew wastes hours hauling debris by hand. Too close and you risk scratching siding or blocking exits.
Neighbors matter too. A dumpster is noisy, visible, and sometimes smelly. Give nearby households a heads-up about delivery dates and expected duration. Keep the container covered or tarped if rain is forecast, since wet debris weighs more and can trigger overage fees. Never let the dumpster become a neighborhood dumping ground: once word gets out, random furniture and yard waste appear overnight, and you pay the disposal cost. A simple lock or a clearly posted sign helps, but the best defense is a short rental window and prompt pickup scheduling.
Timing the Rental to Match Your Renovation Phases
Dumpster timing is a scheduling problem, and getting it wrong costs money in two directions. If the container arrives too early, it sits empty for days while you pay for rental time and it blocks your driveway. If it arrives too late, demolition debris piles up in the yard, slows the crew, and creates safety hazards. The sweet spot is to have the dumpster on site the morning demolition begins and picked up within a day or two of the final load.
Large projects rarely fit into a single rental window. A whole-home renovation might need a container for the demolition phase, another for the rough-in and framing phase, and a final one for punch-list cleanup. Rather than keeping one dumpster parked for months, schedule swaps. Most companies charge a delivery and pickup fee per swap, so plan the phases to minimize trips. Coordinate with your contractor on a debris calendar: when demo starts, when the first container should be swapped, and when final cleanup happens. Put those dates in writing.
Weather adds another variable. Rain turns drywall and insulation into heavy sludge. Snow and ice make delivery risky. If you are renovating in winter, build flexibility into the schedule and confirm the hauler's policy on weather delays. For urgent repairs, such as a burst pipe that requires immediate demolition of soaked materials, you may need same-day or next-day service. Emergency hauling costs more, which is another reason to keep a small contingency in your debris budget. If you need help fast, platforms like Repairmen connect homeowners with local pros for emergency repairs and remodeling, and they can often advise on immediate debris handling while you arrange a container.
Costs, Weight Limits, and Avoiding Surprise Fees
Dumpster rental pricing looks simple on the surface: one flat rate for delivery, rental period, and pickup. The surprises hide in the details. Weight overages, extra rental days, prohibited items, and fuel surcharges can turn a quoted price into a much larger invoice. Understanding the common fee triggers lets you plan accurately and dispute unfair charges with confidence.
Typical cost components include:
- Base rental: covers the container, delivery, pickup, and a set rental period (often 7 to 14 days).
- Weight allowance: usually 1 to 2 tons for general debris, less for heavy materials unless you book a heavy-debris container.
- Overage fees: charged per ton when you exceed the allowance, often $50 to $100 per ton.
- Extra day fees: charged when you keep the container beyond the included period.
- Prohibited item fees: tires, mattresses, electronics, paint, and hazardous waste usually cannot go in a standard construction dumpster. Removing them after the fact is expensive.
The most effective way to control costs is to separate waste streams before the container arrives. Metals can often be recycled or sold. Cardboard can be flattened and recycled curbside. Hazardous materials like paint, solvents, and asbestos-containing products require special disposal and should never enter a general dumpster. Asbestos deserves particular caution: older homes may contain asbestos in floor tiles, insulation, and siding. If you suspect it, stop work and hire a licensed abatement professional. The cost of testing is trivial compared to the legal and health consequences of improper disposal.
Another cost saver is compaction. Breaking down cabinets, crushing cardboard boxes, and stacking flat materials uses container space efficiently. Just avoid overfilling above the rim: haulers cannot legally transport overloaded containers on public roads, and they will either refuse pickup or charge a loading fee. Keep the load level and secure a tarp over the top if required.
Do It Yourself or Hire It Out
Some homeowners handle debris removal themselves to save money. That can work for small projects with light materials and easy access to a transfer station. You load your truck or trailer, pay the disposal fee by weight, and make multiple trips. The math changes quickly when you factor in your time, vehicle wear, and disposal fees. For a single bathroom, DIY hauling might save a few hundred dollars. For a kitchen or roof, the volume and weight make professional service the better value.
Hiring a hauling company or letting your general contractor manage debris offers several advantages. You get the right container size, compliant disposal, and a paper trail for permits and warranties. You also avoid the physical toll of hauling heavy material, which is a genuine injury risk for untrained homeowners. The trade-off is cost and scheduling dependence. Whichever route you choose, get the scope in writing: who orders the container, who pays the overage, who is responsible for prohibited items, and when the container leaves the site.
When you are comparing renovation bids, ask each contractor how debris removal is handled and whether it is included in the quoted price. A bid that excludes haul-away is not necessarily worse, but you need to add that cost back in to compare fairly. FreeQuotes.Contractors exists to make that comparison easier: submit your project details once and receive competing quotes from pre-vetted local contractors, then evaluate each bid with debris handling clearly stated.
Safety and Environmental Best Practices
Debris removal is not just logistics; it is a safety and environmental responsibility. Sharp edges, heavy loads, and dust are constant hazards during demolition. Wear gloves, eye protection, and sturdy boots when handling waste. Never stand under a raised dumpster or between the truck and the container during delivery. Keep children and pets away from the drop zone. If you are removing materials that may contain lead paint (common in homes built before 1978), follow EPA guidelines and avoid dry sanding or uncontrolled demolition.
Environmentally, construction waste is a major landfill contributor. You can reduce the impact by sorting recyclables, donating usable fixtures and cabinets to local reuse stores, and choosing haulers who recycle concrete, metal, and clean wood. Some municipalities offer rebates or reduced disposal fees for separated loads. Ask your hauler what happens to the contents of your dumpster. A company that sorts and recycles is worth a small premium, and the choice reflects well on your renovation.
Finally, document everything. Take photos of the dumpster placement before delivery and after pickup, keep receipts for disposal fees, and save the permit if one was required. If a dispute arises over damage or overage charges, documentation is your leverage. Good records also help when you sell the home: buyers appreciate evidence that renovations were done responsibly, including proper waste disposal.
Debris removal and dumpster planning for home renovation will never be the most exciting part of your project, but it is one of the most controllable. Size the container to the job, place it wisely, time the rental to your demolition schedule, and budget for weight limits and permits before you start. Do that, and the mess stays in the dumpster instead of taking over your project. When you are ready to line up contractors who understand debris logistics from day one, start by comparing local quotes and let the professionals handle the heavy lifting.